Step 1: Installing the Arduino IDE
- Open a browser and go to the official Arduino website.
- Download the Arduino IDE for your operating system.
- Windows users: choose the Installer (easiest) or ZIP file.
- macOS users: download the .dmg file and drag Arduino into Applications.
- Linux users: use the tarball or your distribution’s package manager.
- Install and launch the Arduino IDE
Step 2: Connecting the Arduino Nano
- Plug in your Nano using a good quality data cable.
⚠️ Warning: Many cheap USB cables are “charge-only” (they power the board but don’t transfer data). If your Nano lights up but no COM port appears, swap the cable. - Your operating system should detect the Nano:
Windows: open Device Manager → Ports (COM & LPT). You see something like
USB-SERIAL CH340 (COM3) or CP210x USB to UART (COM4).
macOS: open Terminal and type: ls /dev/tty.* Look for usbserial-XXXX.
Linux: type dmesg | tail
after plugging in; you should see something like /dev/ttyUSB0
- If nothing shows up: install the USB driver.
- CH340 Driver: Click Here to download
- CP2102 Driver: Click Here to Download
- Install, then reconnect your Nano. The port should appear
Step 3: Setting up Arduino IDE
In Arduino IDE:
- Go to Tools → Board → Arduino Nano.
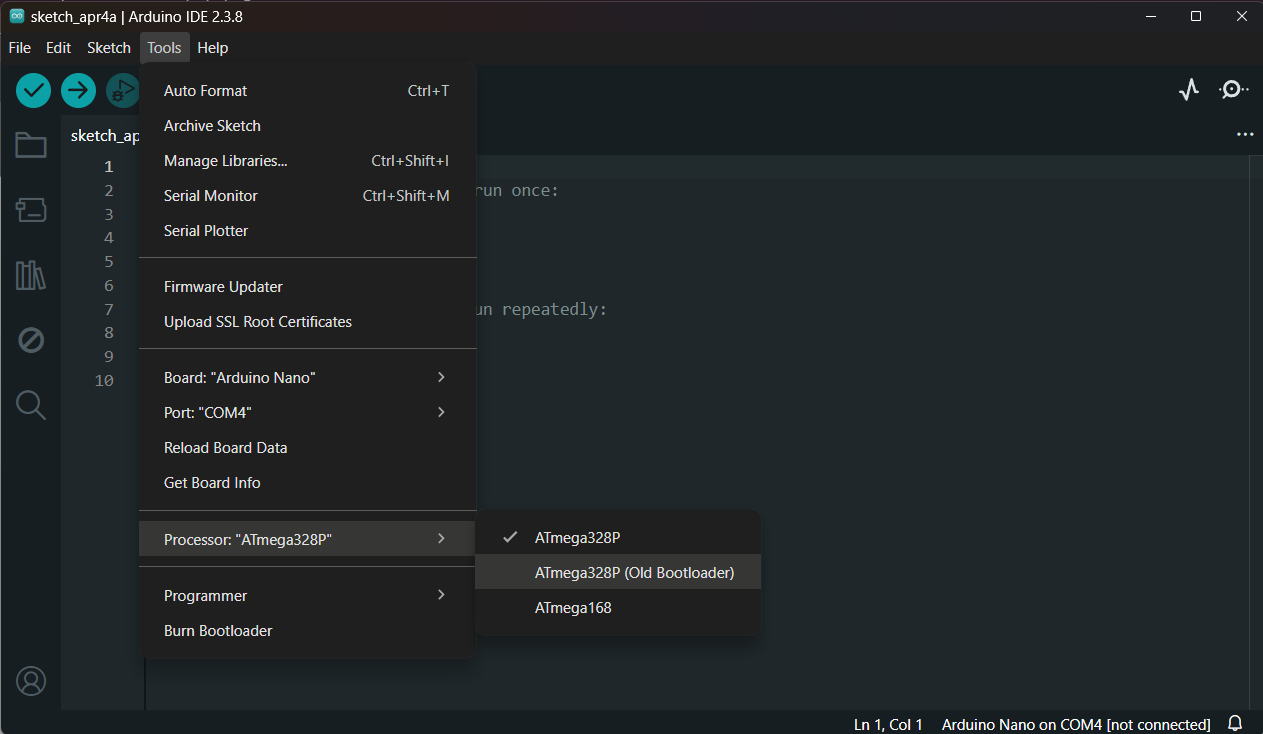
- Go to Tools → Processor and choose:
- ATmega328P (default for modern boards).
-
- If you get errors while uploading (like not in sync), switch to ATmega328P (Old Bootloader).
This setting is crucial because many Nano clones still use the older bootloader.
- If you get errors while uploading (like not in sync), switch to ATmega328P (Old Bootloader).
Go to Tools → Port and select the COM port that appeared earlier.